Measuring campaigns to results with influencers is very easy with the Meta Pixel.
With this code, which you can put on your destination web page, you will collect information and be able to track the actions taken by people who visit your site.
In this way, you will understand the path that users who come to your site take from your campaigns to results with influencers that you will do with us.
Remember that this code is “invisible” to users who visit your page, but very valuable to you.
We tell you how to assign a Pixel

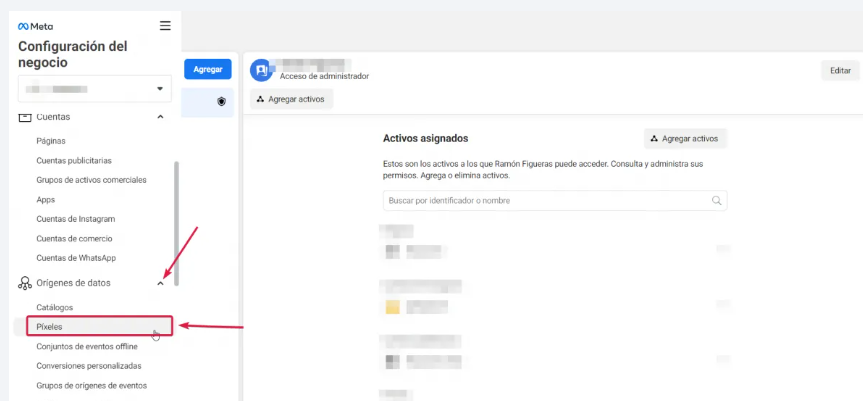
✅ Enter the Facebook Business Manager platform and click on Business Settings: https://business.facebook.com/settings/
✅ Later open the “Data Sources” dropdown and then “Pixels”
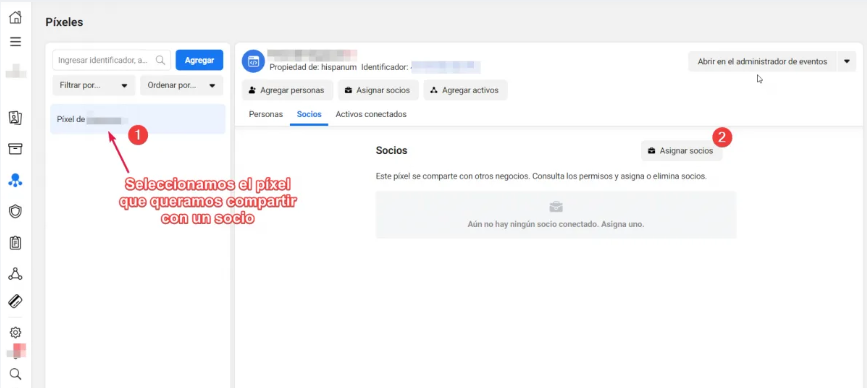
✅ Once inside, select the target pixel and share it with us, since we are the ones who will manage your campaign.

✅ Remember that we will always ask your permission to access this code.
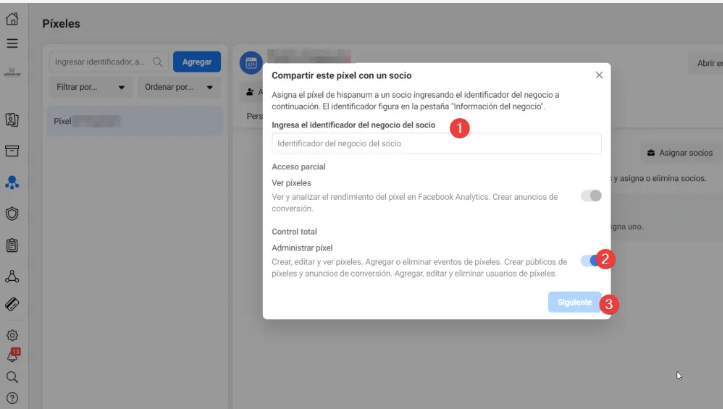
✅ We leave you here our business ID so you can assign us a role within the platform:
business_account = 114645803166135
✅ This way we can create audiences and work on different types of campaigns on Facebook Ads, this depends on your objective.

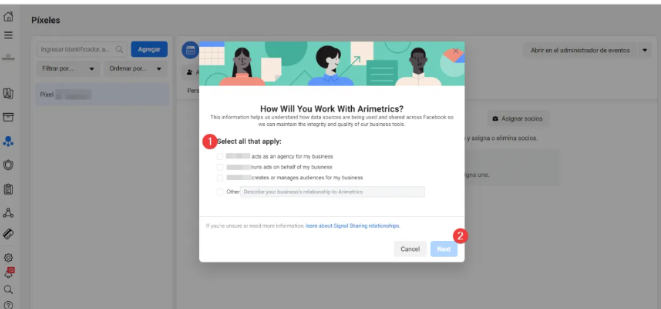
✅ Select the degree of involvement you have with SocialPubli, when giving us access to your Facebook/Meta pixel. If it doesn’t fit any of the three, you can write it down.

⚠️ Remember that in order to use the pixel, you need to have a website or an online store.
If you want to know more about the implementation of Meta pixels in your business. We leave you the link to the Meta help service for companies